By: Vlad Fedosov
If your reading this then you are likely ether someone that has a scope that is in need of a cosmetic makeover or just want to change the color of your scope! It’s a fun project to take on, fully vinyling a scope and something that anyone can do with a little patience! I learned the art of vinyling by first vinaling my own e46 BMW m3(from carbon black to white!) and then by working as a pro detailer/vinyler at dealerships in a past life;)
So let’s get to it. You will need a few things to complete this project. This includes the following items:
-razor blade -> https://amzn.to/3dgh0Ny
-vinyl of choice -> https://amzn.to/33GGMYm
-vinyl cutting string -> https://amzn.to/2GU68ZD
-some alcohol and a microfiber cloth -> https://amzn.to/3jKNIsV
The first step is to take your scope apart if needed. This will vary by model so I won’t go into the steps of this. But what you want to end up with is all the surfaces that need to be vinyled should be exposed past where the focuser/dew shield will go onto. That way you will end up with a very clean and professional-looking installation.
The next step is to thoroughly wipe down all the surfaces where the vinyl will be applied with the microfiber cloth and some alcohol. This ensures that all the surfaces are grime/oil-free and the vinyl adheres very well.

Next up we install a line of vinyl cutting string to the bottom of the tubes where the vinyl will be installed. What this does is allow you to make a very straight line where the two sides of the vinyl will meet.
Next cut a piece of vinyl that will have plenty of margins to cover the tube your working with on each side and apply the vinyl. The vinyl will apply the best if you use a little tension as you are applying it. Try not to get any large air bubbles in as you are applying the vinyl. If you do have a few small bubbles that is not the end of the world as they should go away on their own after a few weeks. Make sure you end up with the two sides overlapping over the top of the vinyl cutting string.

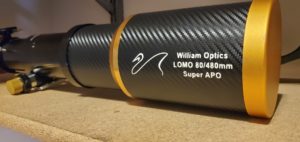
Next, you will need to trim the ends of the tubes vinyl. Use a brand new blade and cut right along the edge of the tube and you should get a very nice looking edge. Make sure you do not cut off the vinyl cutting string! As you can see my application is a bit more advanced as I own a vinyl cutter and had a design in the vinyl that I put on the dew shield.

The last step is to cut the two ends of the vinyl with the vinyl cutting string we installed earlier. This can be a bit tricky depending on how thick your vinyl is. I find it works best if you make a small slit with your razor blade where the string starts to help it get going. Then hold down the vinyl on either side of the string with your fingernails and start to pull the string towards the back. Having someone help you in this step is very helpful. If all goes well you should have a nicely cut clean seam. You will need to peel away the overlapping layers of the vinyl before making the final contact seam.
Repeat this process for the remaining surfaces that you need to be done and you should end up with an entirely fresh new look on your scope! If you have any questions ree to shoot me an email. If you would like a quote on me doing this to your scope feel free to shoot me an email as well.